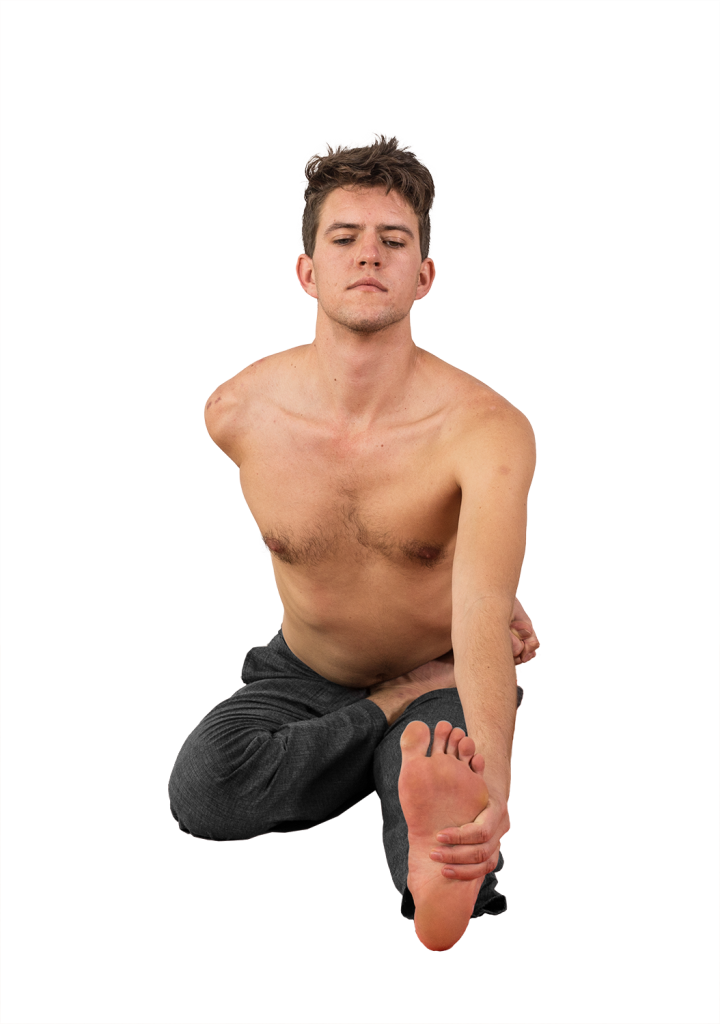

Ardha Baddha Padma Paschimottanasana is the ninth pose of the primary series, and the fourth seated pose. It is essentially the same as Ardha Baddha Padmottanasana, simply seated.
The following is a discussion of the position on the right side, as pictured. As an asymmetrical posture, it must be repeated on the left side.
This posture requires the leg to be placed in Lotus posture. If your leg can’t be comfortably placed in Lotus, don’t add this posture until you have given more time to and had the benefit of the Marichyasana and Padmasana positions. Binding the foot requires significant shoulder flexibility, and the practice of this posture serves to lengthen the Pectoralis muscles and bring the shoulders into a more healthful alignment. The position of the foot—pressing into the lower belly—also teaches the release of the rectus abdominis muscle during forward folding.
As in any of the Lotus family, be sure to keep the foot and ankle strong and contiguous with the leg. Allowing the ankle to “cave in” (inversion of the foot/ankle) will lead to ankle strain or a sprain.
It is helpful to use the entire torso to your advantage. Let your torso follow your arm in the twist as you reach back to bind your big toe. Once you’ve taken hold, try and leave your arm and shoulder where they are in space and twist the torso back to center, effectively lengthening the muscles of the collarbone and the chest.
Be sure you don’t allow the binding arm and bound leg to become dormant. Pull with the hand and resist with the foot; this interplay will contribute to the strength, lift, and integrity of the posture.
Step by step
From Sat, jump through and land in Dandasana.
Inhale, place the right leg in half lotus.* Reach back and bind with the first two fingers of your right hand. Reach the left hand up and lengthen the abdomen and torso.
Exhale, fold forward and talk hold of the outer edge of the left foot with the left hand.
Inhale and reset, tugging with the strength of the shoulders to pull the chest through the arms, straightening the spine.
Exhale, fold forward fully. This is the state of the pose; hold for five breaths.
Inhale, sit up and release both hands, placing them to the sides of the hips.
Exhale, jump back and take vinyasa.**
Repeat for the second side.
*Some practitioners require additional time to get the leg properly placed in Lotus. This is okay; take your time. After you have gained some experience, try and maintain the count and move with the breath as described.
**Traditionally, vinyasa is taken between sides of asymmetrical postures. If you’re just starting out and building stamina, or have time constraints and require a faster practice, the vinyasa between sides may be omitted.
ALTERNATIVES & SOLUTIONS
If the hamstrings feel quite tight, or if you’re unable to sit up straight (the spine is rounding), place a blanket or block beneath the hips. Add additional support if necessary until both the legs and spine can be straightened.
If you have had knee injury or surgery, and/or feel a pinching sensation when the knee is closed fully in this way, place a rolled up washcloth or piece of fabric behind the knee. When you squeeze the cloth with your knee, the bones of the femur and tibia will be held slightly apart. In the majority of cases, this alleviates or eliminates any pinching sensation or pain. The more severe the injury, the greater amount of cloth should be used. The support can be reduced over time as the joint heals.
COMMON MISTAKES
I do not recommend trying to learn to do lotus in this posture. I see practitioners trying to do this with the foot halfway up the thigh instead of at the hip crease. This alignment places a great deal of shearing pressure in the knee and I do not think it gives much benefit. In the meantime, Janu Sirsasana A is a suitable alternative. Save your effort for Marichyasana or other poses that are more effective and less risky.